Description
MozillaCacheView is a small utility that reads the cache folder of Firefox/Mozilla/Netscape Web browsers,
and displays the list of all files currently stored in the cache.
For each cache file, the following information is displayed: URL, Content type, File size, Last modified time,
Last fetched time, Expiration time, Fetch count, Server name, and more.
You can easily select one or more items from the cache list, and then extract the files to another folder, or
copy the URLs list to the clipboard.
If you want to view the cache files of Internet Explorer, you can use this
Internet Explorer Cache Viewer
System Requirements
This utility works on any version of Windows, From Windows 98 to Windows 7.
You can use this utility even if Firefox/Mozilla is not installed on your system, as
long as you have the entire cache folder that you want to inspect.
The Location Of Mozilla Cache Folder
The cache folder of Mozilla Firefox is located under C:\Documents and
Settings\[User Name]\Local Settings\Application
Data\Mozilla\Firefox\Profiles\[Profile Name]\Cache
The cache folder of SeaMonkey is located under C:\Documents and
Settings\[User Name]\Local Settings\Application
Data\Mozilla\Profiles\[Profile Name]\Cache
For other variants of Mozilla, you may find the cache folder under
C:\Documents and Settings\[User Name]\Application
Data\Mozilla\Profiles\[Profile Name]\Cache
Using MozillaCacheView
MozillaCacheView doesn't require any installation process or additional
DLL files. Just copy the executable file (MozillaCacheView.exe) to any
folder you like, and run it.
After you run it, the main window displays the list of files currently
stored in the cache of the Mozilla/Firefox profile that you used in the
last time.
If you want to view the cache of another profile, simply use the 'Select
Cache Folder' option (F9), and choose the desired cache folder.
You can select one or more cache files from the list, and than export
the list into text/html/xml file ('Save Selected Items' option),
copy the URL list to the clipboard (Ctrl+U), copy the entire table of
cache files (Ctrl+C), and then paste it to Excel or to OpenOffice
spreadsheet.
You can also extract the actual files from the cache, and save them into
another folder, You can do that by using the
'Copy Selected Cache Files To' option (F4).
Notice...
In order to watch the latest cache files, you must close all Windows of Firefox, because only when you do that,
Firefox saves the cache index files into the disk.
Notice For Delete Option
When you delete files from the cache, MozillaCacheView delete the cache
files, but it doesn't delete the reference to them in the cache index
file.
This means that even after you delete files from the cache, you'll still
see them in the list, but the 'Missing File' column will be turned from
'No' to 'Yes'.
Command-Line Options
|
/stext <Filename>
| Save the list of all cache files into a regular text file.
|
|
/stab <Filename>
| Save the list of all cache files into a tab-delimited text file.
|
|
/scomma <Filename>
| Save the list of all cache files into a comma-delimited text file.
|
|
/stabular <Filename>
| Save the list of all cache files into a tabular text file.
|
|
/shtml <Filename>
| Save the list of all cache files into HTML file (Horizontal).
|
|
/sverhtml <Filename>
| Save the list of all cache files into HTML file (Vertical).
|
|
/sxml <Filename>
| Save the list of all cache files to XML file.
|
|
/sort <column>
|
This command-line option can be used with other save options for sorting by the desired column.
If you don't specify this option, the list is sorted according to the last sort that you made from the user interface.
The <column> parameter can specify the column index (0 for the first column, 1 for the second column, and so on) or
the name of the column, like "Content Type" and "Filename".
You can specify the '~' prefix character (e.g: "~URL") if you want to sort in descending order.
You can put multiple /sort in the command-line if you want to sort by multiple columns.
Examples:
MozillaCacheView.exe /shtml "f:\temp\1.html" /sort 2 /sort ~1
MozillaCacheView.exe /shtml "f:\temp\1.html" /sort "~Content Type" /sort "File Size"
|
|
/nosort
|
When you specify this command-line option, the list will be saved without any sorting.
|
|
-folder <Cache Folder>
|
Start MozillaCacheView with the specified cache folder.
|
|
/copycache <URL> <Content Type>
|
Copy files from the cache into the folder specified in /CopyFilesFolder
parameter.
In the <URL> parameter, you can specify the URL of the Web site
(for example: http://www.nirsoft.net) or empty string ("") if you want
to copy files from all Web sites.
In the <Content Type> parameter, you can specify full content type
(like image/png), partial content type (like 'image') or empry string
("") if you want to copy all types of files.
|
|
/CopyFilesFolder <Folder>
|
Specifies the folder to copy the cache files.
|
|
/UseWebSiteDirStructure 0 | 1
|
Save the files in the directory structure of the Web site. 0 = No, 1 = Yes
|
|
/UpdateModifiedTime 0 | 1
|
Update the modified time of the copied files according to modified time in the Web server. 0 = No, 1 = Yes
|
|
/NewNameIfExist 0 | 1
|
Copy as new name if filename already exists. 0 = No, 1 = Yes
|
Examples:
MozillaCacheView.exe -folder "C:\Documents and
Settings\Administrator\Local Settings\Application
Data\Mozilla\Firefox\Profiles\acf2c3u2.default\Cache"
MozillaCacheView.exe -folder "C:\Documents and
Settings\Administrator\Local Settings\Application
Data\Mozilla\Firefox\Profiles\acf2c3u2.default\Cache" /shtml
c:\temp\mz.html
MozillaCacheView.exe /stext c:\temp\mz.txt
Copy Cache Examples:
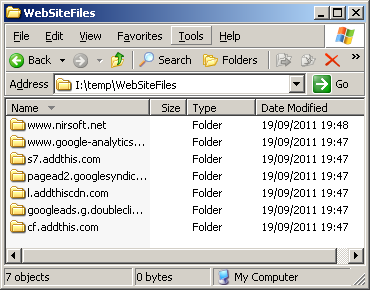
- Copy all cache files of www.nirsoft.net to f:\temp in the directory structure of the Web site:
/copycache "http://www.nirsoft.net" "" /CopyFilesFolder "f:\temp" /UseWebSiteDirStructure 1
- Copy all image cache files of www.nirsoft.net to f:\temp:
/copycache "http://www.nirsoft.net" "image" /CopyFilesFolder "f:\temp" /UseWebSiteDirStructure 0
- Copy all .png files from the cache to f:\temp:
/copycache "" "image/png" /CopyFilesFolder "f:\temp" /UseWebSiteDirStructure 0
- Copy all files from the cache to f:\temp:
/copycache "" "" /CopyFilesFolder "f:\temp" /UseWebSiteDirStructure 0
Translating MozillaCacheView to other languages
In order to translate MozillaCacheView to other language, follow the instructions below:
- Run MozillaCacheView with /savelangfile parameter:
MozillaCacheView.exe /savelangfile
A file named MozillaCacheView_lng.ini will be created in the folder of MozillaCacheView utility.
- Open the created language file in Notepad or in any other text editor.
- Translate all string entries to the desired language.
Optionally, you can also add your name and/or a link to your Web site.
(TranslatorName and TranslatorURL values) If you add this information, it'll be
used in the 'About' window.
- After you finish the translation, Run MozillaCacheView, and all translated
strings will be loaded from the language file.
If you want to run MozillaCacheView without the translation, simply rename the language file, or move
it to another folder.